
安装Node.js
安装选项全部默认,一路点击Next。安装过程较为简单,不再赘述。
最后安装好之后,按Win+R打开命令提示符,输入node -v和npm -v,如果出现版本号,那么就安装成功了。
添加国内镜像源
如果没有梯子的话,可以使用阿里的国内镜像进行加速。
1 | npm config set registry https://registry.npm.taobao.org |
安装Git
安装完成后在命令提示符中输入git --version验证是否安装成功。
注册Github账号
新建一个项目,如下所示: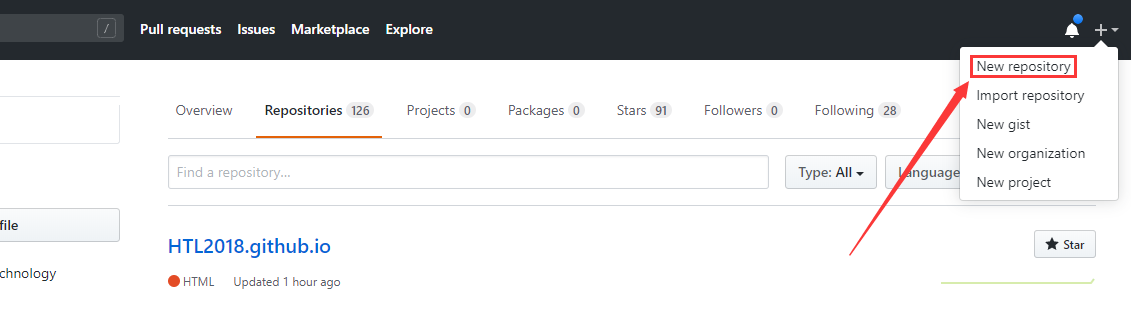
然后如下图所示,输入自己的项目名字,后面一定要加.github.io后缀,README初始化也要勾上。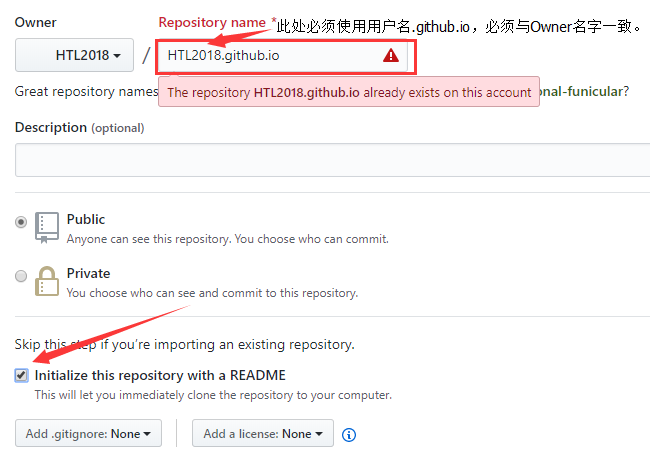
然后项目就建成了,点击Settings,向下拉到最后有个GitHub Pages,点击Choose a theme选择一个主题。然后等一会儿,再回到GitHub Pages,会变成下面这样: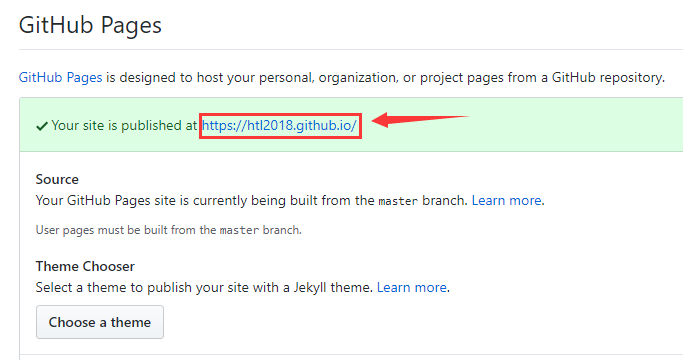
点击那个链接,就会出现自己的网页了。
安装Hexo
在合适的地方新建一个文件夹,用来存放自己的博客文件。
在该目录下右键点击Git Bash Here,打开git的控制台窗口.。***注意:以后我们所有的操作都在git控制台进行,就不要用Windows自带的控制台了。
定位到该目录下,输入npm i hexo-cli -g安装Hexo。
安装完后输入hexo -v验证是否安装成功。
然后就要初始化我们的网站,输入hexo init初始化文件夹,接着输入npm install安装必备的组件。
这样本地的网站配置也弄好啦,输入hexo g生成静态网页,然后输入hexo s打开本地服务器,然后浏览器打开http://localhost:4000/,就可以看到我的博客啦,效果如下: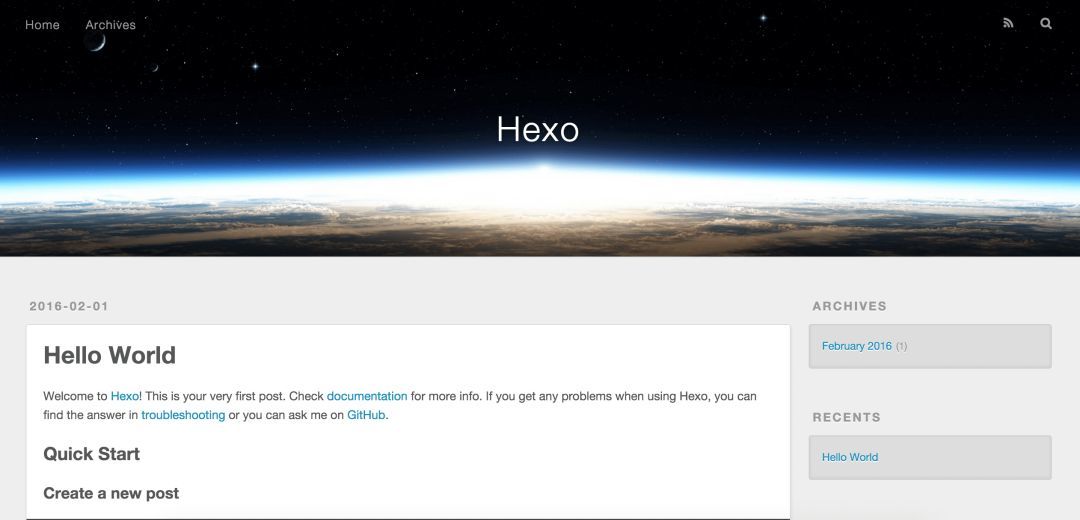
按ctrl+c关闭本地服务器。
连接Github与本地
首先右键打开git bash,然后输入下面命令:
1 | git config --global user.name "HTL2018" |
用户名和邮箱根据你注册github的信息自行修改。
然后生成密钥SSH key:
1 | ssh-keygen -t rsa -C "1758108009@qq.com" |
打开 GitHub,在头像下面点击settings,再点击SSH and GPG keys,新建一个SSH,名字随便。git bash中输入
1 | cat ~/.ssh/id_rsa.pub |
将输出的内容复制到框中,点击确定保存。
输入ssh -T git@github.com,如果如下图所示,出现你的用户名,那就成功了。
打开博客根目录下的_config.yml文件,这是博客的配置文件,在这里你可以修改与博客相关的各种信息。
修改最后一行的配置:
1 | deploy: |
repository修改为你自己的github项目地址。
写文章、发布文章
首先在博客根目录下右键打开git bash,安装一个扩展npm i hexo-deployer-git。
然后输入hexo new post "article title",新建一篇文章。
然后打开博客根目录\source\_posts的目录,可以发现下面多了一个.md文件,即为博客的.md文件。
编写完markdown文件后,根目录下输入hexo g生成静态网页,然后输入hexo s可以本地预览效果,最后输入hexo d上传到github上。这时打开你的github.io主页就能看到发布的文章啦。
个性化设置
两个重要的配置文件
配置文件一:博客根目录/_config.yml
配置文件一中配置的各个选项的含义:配置文件1
配置文件二:博客根目录/themes/yilia/_config.yml
配置文件二中配置的各个选项的含义:配置文件2
让hexo的首页只显示文章的部分内容而不是全部
在你写 md 文章的时候,可以在内容中加上 <!--more-->,这样首页和列表页展示的文章内容就是 <!--more--> 之前的文字,而之后的就不会显示。
文章头设置
首先为了新建文章方便,建议将/scaffolds/post.md修改为如下代码:
1 |
|
这样新建文章后不用你自己补充了,修改信息就行。
添加404页面
原来的主题没有404页面,加一个也不是什么难事。首先在/source/目录下新建一个404.md,内容如下:
1 |
|
然后在/themes/yilia/layout/目录下新建一个404.ejs文件,内容如下:
如下:
1 |
|
然后在/themes/matery/layout/目录下新建一个404.ejs文件,内容如下:
1 | <style type="text/css"> |